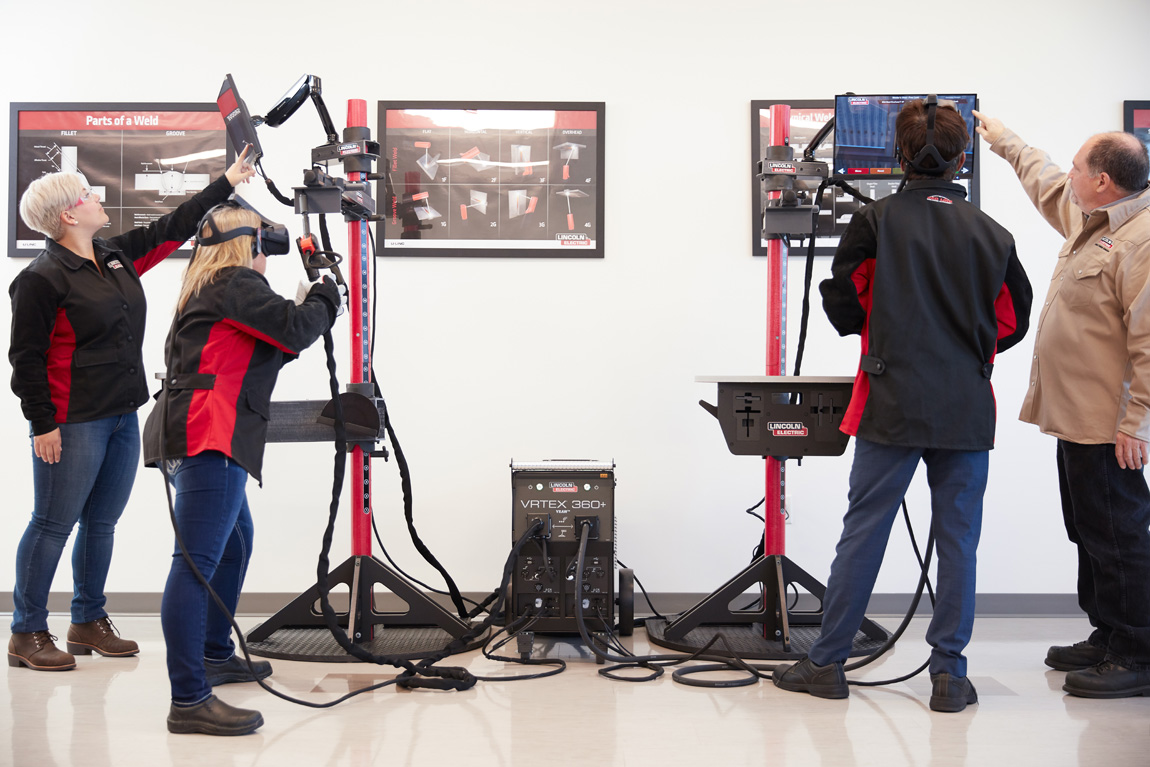
Welding Lab Layouts That Boost Engagement and Safety for Students
Designing Welding Labs That Support Safer Training, Better Skills, and Real-World Readiness

When it comes to teaching welding, your lab layout matters more than most people realize. A well-designed space doesn’t just keep students safe—it helps them learn faster, stay engaged, and build habits they’ll carry straight into the workforce.
Whether you’re building a brand-new welding lab or trying to improve the one you already have, a few thoughtful layout choices can make a big difference. Let’s walk through some practical strategies that help create safer, more effective welding classrooms.
Instructor Visibility: A Critical Priority
If you can’t see what students are doing, you can’t correct bad habits—or stop unsafe ones—quickly enough. Clear sightlines are one of the most important elements of a safe welding lab.
A few layout ideas that work well:
- Semi-open welding booths instead of fully enclosed rows
- Staggered booth placement so nothing blocks your view
- Wide, central walkways that let you reach every station fast
Many programs find modular welding booths especially helpful. They’re easier to configure for different room sizes while still meeting ventilation and safety needs—and they keep instructors in the loop.
Learning Zones Set Up with Purpose
Breaking the lab into clearly defined areas helps everything flow better and cuts down on unnecessary movement during welding time.
Strong welding labs usually include:
- A demonstration area for instruction and pre-weld talks
- Individual welding booths with proper fume extraction
- Material prep stations for cutting, grinding, and fit-up
- A dedicated space for inspecting and discussing welds
This setup mirrors real shop environments and helps students understand that welding isn’t just striking an arc—it’s a full, intentional process from start to finish.
Integrate Virtual Welding to Improve Safety and Skill Progression
Virtual Welding systems are becoming a powerful tool in modern welding labs—especially or introducing beginners to proper technique in a safer environment.
By allowing students to practice torch angles, travel speed, positioning, and hand control before live welding, virtual welders reduce early exposure to heat, fumes, and arc flash while still delivering strong instruction.
Benefits of incorporating virtual welders include:
- Improved safety during early skill development
- Immediate feedback on technique and motion
- Faster confidence-building before live welding
- Reduced material and consumable waste
From a layout standpoint, virtual welding stations work best when placed near the instruction or demonstration area. This allows instructors to coach multiple students at once, review performance data, and reinforce fundamentals before students move into individual welding booths.
Many programs now follow a three-step learning flow:
- Instructor demonstration and discussion
- Virtual welding practice and assessment
- Live welding in individual booths
This progression keeps students safer while maintaining instructional effectiveness and mirrors how many industry training programs introduce new welders.
Smart Traffic Flow to Maximize Safety
Crowded walkways and students cutting through active welding areas are accidents waiting to happen. A good lab layout keeps traffic predictable and out of harm’s way.
Helpful safety-focused tips:
- Clearly marked walkways behind welding booths
- No foot traffic through active welding zones
- Tool and supply storage close to where students use them
Wall-mounted equipment and integrated storage go a long way here. Less clutter on the floor means fewer distractions—and fewer trips and falls.
Safety Equipment Built Into the Design
Students are much more likely to use safety equipment when it’s easy to see and easy to reach.
Key things to plan for:
- PPE storage right near lab entrances
- Clearly marked emergency shutoffs and fire extinguishers
- Eye-wash stations within quick reach of welding areas
When safety stations are built into the lab instead of added as an afterthought, they become part of the culture—not just something students see on a sign.
Better Booth Design Equals Better Engagement
Students do their best work when they’re comfortable, focused, and not fighting their setup.
Well-designed welding booths should include:
- Good task lighting for welding and inspection
- Clean, organized routing for power, gas, and ventilation
- Enough space for proper body positioning and full PPE
When booths are set up right, instructors spend less time fixing layout issues and more time teaching.
Keep Your Design Flexible and Adaptable
Welding programs change—new processes, certifications, and equipment show up all the time. A flexible lab layout helps you keep up without tearing everything apart.
Future-friendly ideas include:
- Modular booths or movable partitions
- Shared utility infrastructure for new machines
- Multi-use areas for demos, certifications, or industry visits
Planning for flexibility upfront often saves money, time, and frustration down the road.
Final Thoughts: Your Lab Layout Is a Teaching Tool
A welding lab isn’t just a room full of equipment—it’s part of how you teach. The way students move through the space, access tools, and receive supervision directly affects safety, engagement, and skill development.
When instructors prioritize visibility, smart workflow, and flexible design, they create labs that feel professional and reinforce strong safety habits. The message is clear from day one:
This is a serious space. Safety matters. Quality matters.
And that mindset stays with students long after they leave the classroom.


